If someone looked on Apple Maps for the things you sell, would they find your business?

If not, you could be missing out on a lot of opportunities. After all, there are over a billion people using Apple products and Apple Maps is the native map app on them all.
The best part is that you’re just a few minutes away from adding your business to Apple Maps. This article will show you how.
Adding your business to Apple Maps in 9 simple steps
Getting your business set up on Apple Maps is as easy as 1,2,…9!
1. Create an Apple ID
If you don’t have one already, you’ll need to create an Apple ID. It doesn’t cost anything and only takes a couple of minutes.
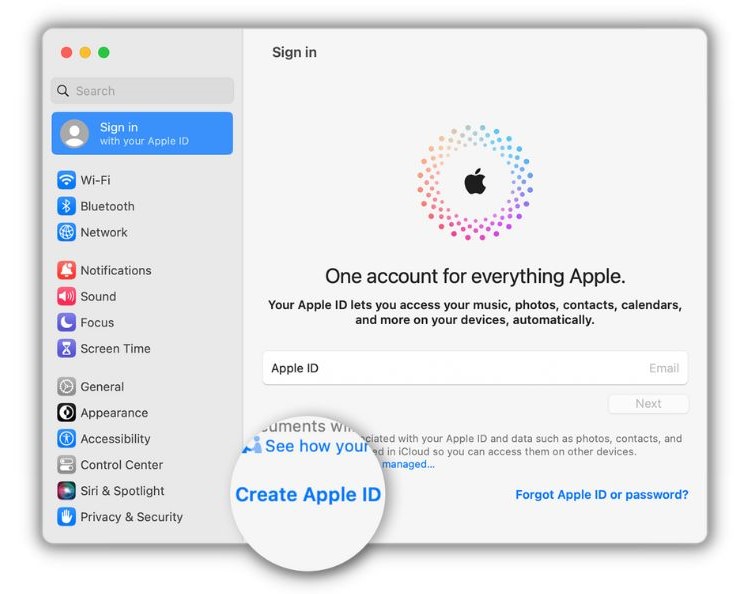
You don’t need to use an Apple product to do it. You can get your ID from a PC or Android device, too.
2. Start on Apple Business Connect
Go to Apple Business Connect. This is where you create or claim your business listing so it can show up on everything Apple, including Maps.
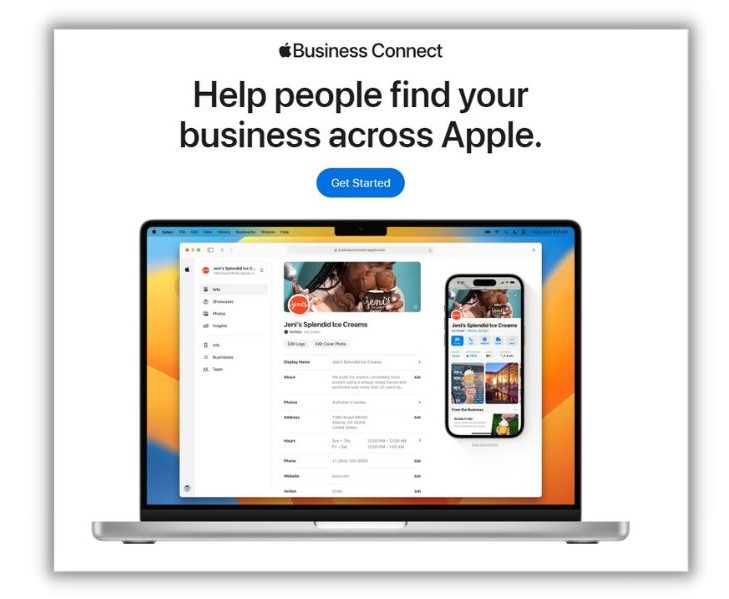
Click the “Get Started” button, enter your Apple ID, and you’re on your way!
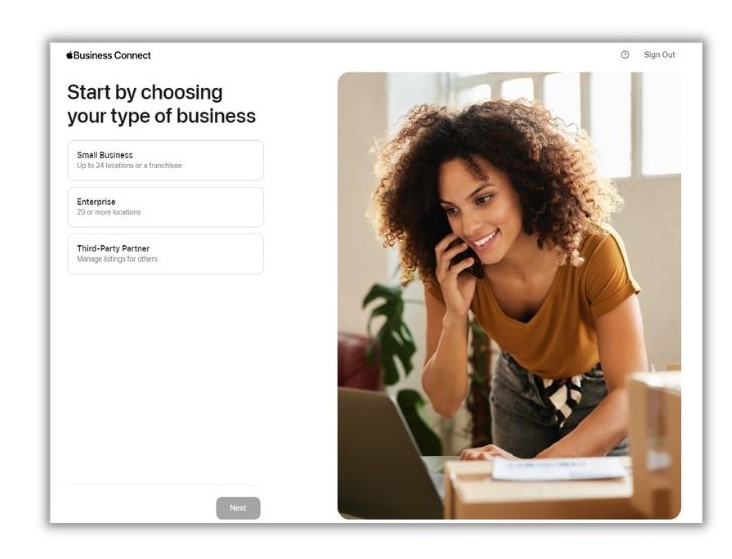
3. Choose your business type
Pick the option that best describes your company. You can choose from small business, enterprise, or third-party partner.
4. Search for your business
Type the name of your business in the search bar. You’ll get a dropdown of possible matches. If there’s already a listing for your location, follow steps five through nine to verify and claim it.
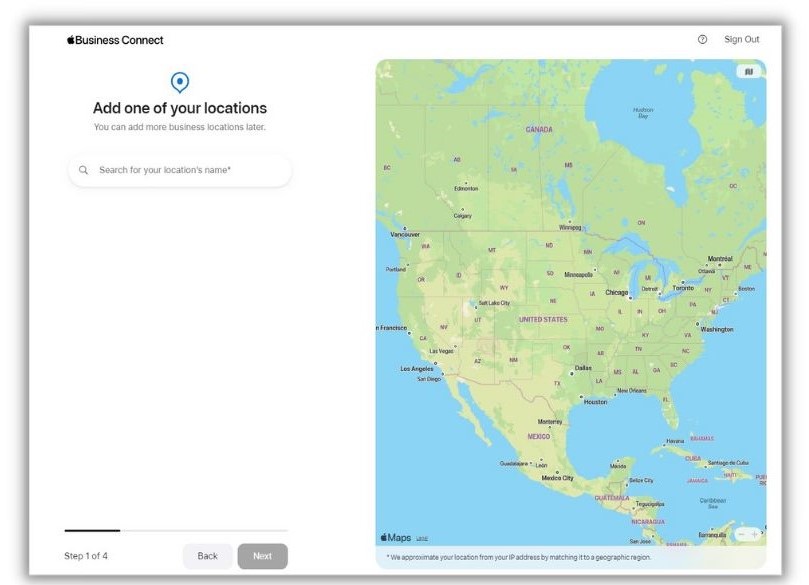
If your business isn’t listed, click “Add a new location with this name” and follow steps five through nine to complete the setup.
Related: Check your business listing information across 20+ top directories like Google and Facebook with this free listings grader.
5. Set the location pin
As you enter or edit your address, Apple will show you a map with a pin placed at your approximate location. You can drag that pin to the exact spot you want people to go.
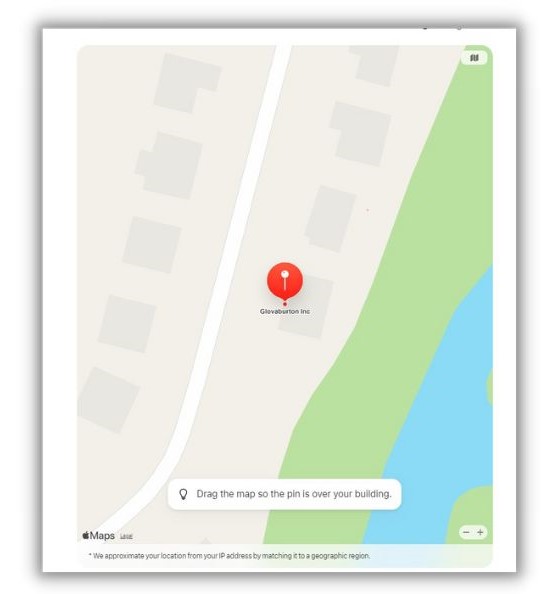
This is really cool if your shop is in a large complex. You get to set the pin at the entrance to help visitors know exactly where to find you.
6. Add details about your business
Now tell Apple a little about your company like your business category (there’s a dropdown of set options) and primary language.
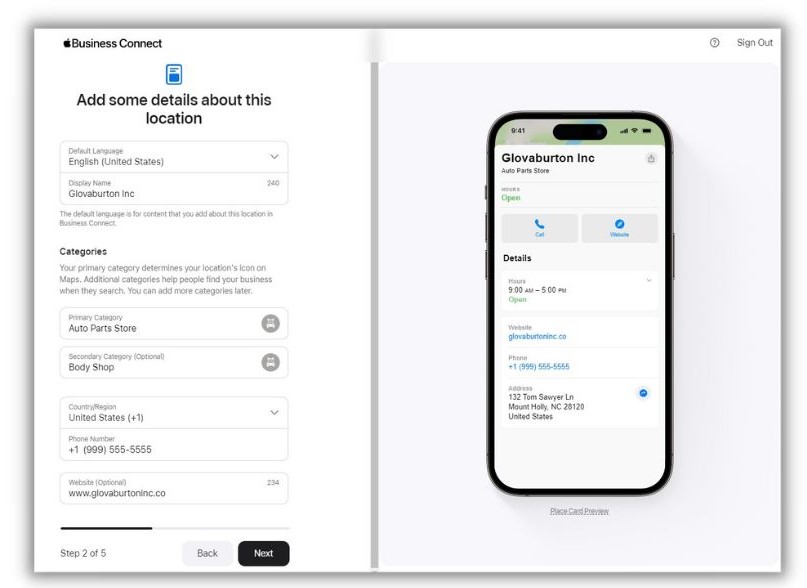
Notice how the phone image updates as you go. You get to see what your customers would see when they search.
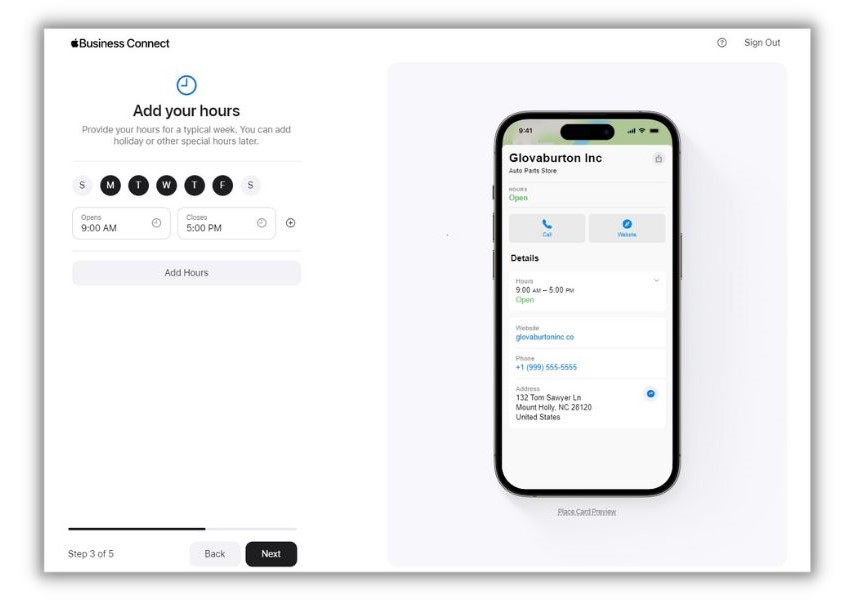
7. Set your hours
The easiest step of them all.
8. Input company details
Tell Apple who owns your company, where it’s headquartered, that sort of thing.
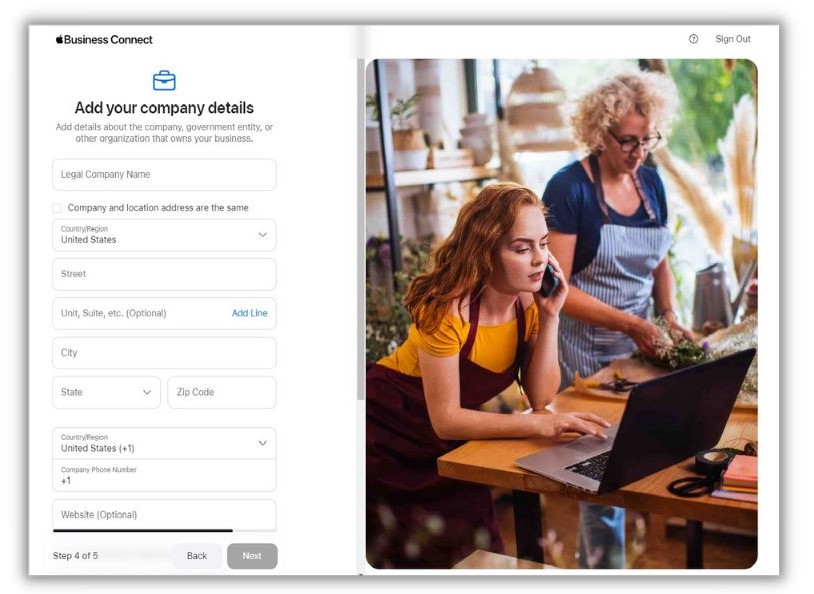
If your business already has a listing, make sure all your details are correct. Don’t skip this step. The more, correct information you include the better chance your customers will find and contact you.
In fact, you should verify this information is accurate for all online directions. You can do it with one click using LocaliQ’s Listings solution.
9. Get Verified
Finally, tell Apple it’s okay to reach you on the business phone you’ve listed. You’ll get a text code to enter. Then after about four or five days, Apple will send you an email confirming that your business is verified or some further questions to make sure you’re legit.
And, voila! You’re ready to be found on Apple Maps.
Why adding your business to Apple Maps is worthwhile
Apple Maps didn’t have the best reputation when it first launched. But its updates are making it a viable option for Apple users looking for businesses like yours. If you haven’t yet claimed your business on Apple Maps, there are some compelling reasons to do it.
It’s free and easy
Even if only a few new customers find you from Apple Maps, it only takes a few minutes to set up and it doesn’t cost anything. Even one profitable customer makes it a pretty good return on that zero-dollar investment.
Get in front of loyal Apple users
The big Apple sold 232 million iPhones in 2022. That’s a huge population of people with access to the Apple Maps app. And that doesn’t include the people that have Macs, tablets, and other connected devices.
Sure, many will download Waze, Google, or another Map app, but as Apple’s version gets better, more will use what’s already on their device. Your Apple listing is the way to get in front of them.
Make sure your details are accurate
It’s very possible that your business already appears in Apple’s Map listings. What if the information it’s gathered is incorrect? Customers may be frustrated by showing up to the wrong location or when you’re not open.
Claiming your Apple Map listing lets you verify and update your company information so your customers have the best experience possible.
Apple map business listing FAQ
You have questions, we have answers.
Why add your business to Apple Maps?
Adding your business to Apple Maps is easy, free, and gets you in front of all the loyal Apple users in your area.
Does it cost to add a business to Apple Maps?
Nope! Adding a business to Apple Maps is free of charge.
What to do if your business is not showing up on Apple Maps?
If your business doesn’t yet show up when you search on Apple Maps, go through the steps listed in this article to create your Apple Business Listing.
How do you update a business on Apple Maps?
You can update the information on Apple Maps by going into your Apple Business Listing as described in this article. Then you can edit things like your hours of operation, phone number, and more.
It’s time to claim your Apple Maps business listing
The more exposure you can get for your business, the better chance people who want to buy what you sell can find you. That’s why it’s important to get included in as many business listing sites as possible. It’ll also help your local SEO.
Apple Maps is an important place to have your business listed, so why not take a few minutes to add your business there?
And while you’re at it, go ahead and optimize your Google Business Profile to get all that sweet traffic from Apple’s main rival.

